What Is the CNC Prototyping Process?
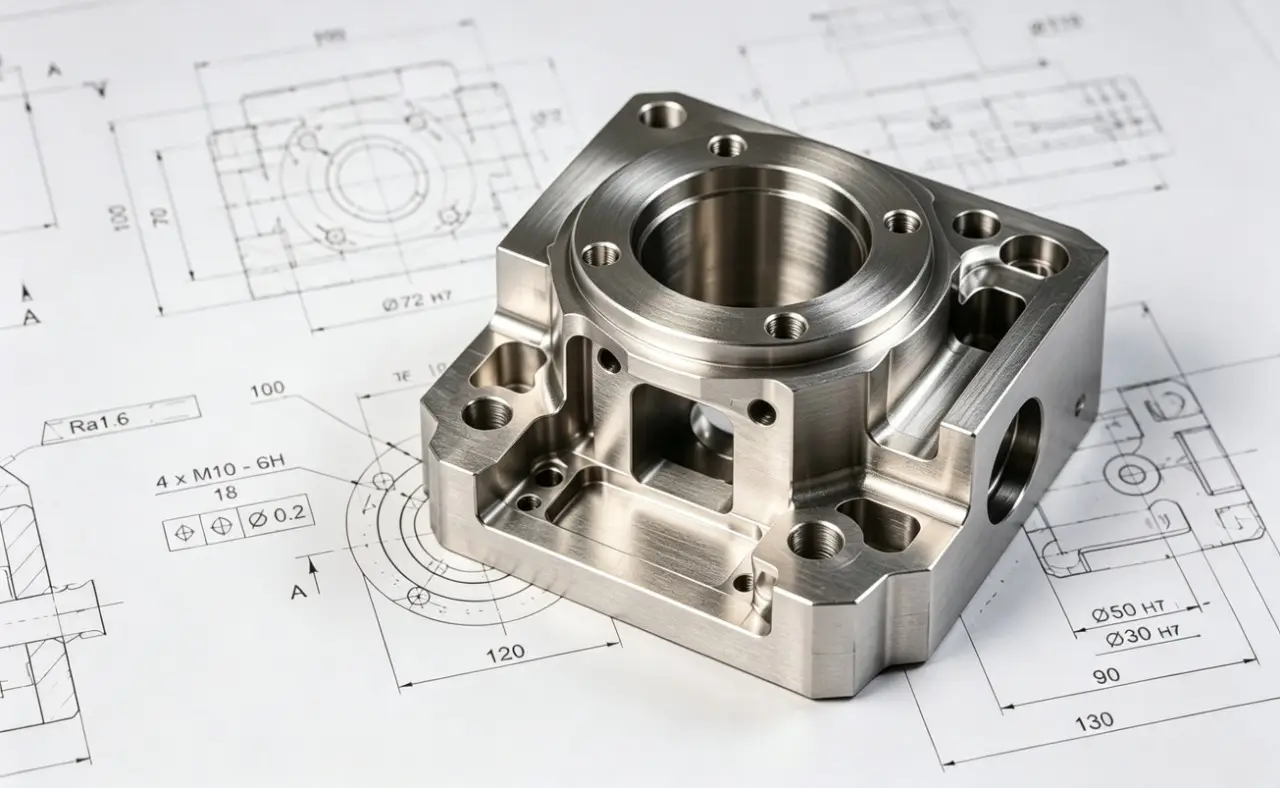
The CNC prototyping process uses production-grade engineering materials and standardized CNC machining to convert customer part requirements into functional, test-ready prototypes. It typically starts with the submission of 3D CAD files and technical requirements, followed by DFM review, transparent quoting, CAM programming, precision CNC machining, surface finishing, quality inspection, and final delivery—ensuring the prototype meets dimensional, structural, and performance specifications.
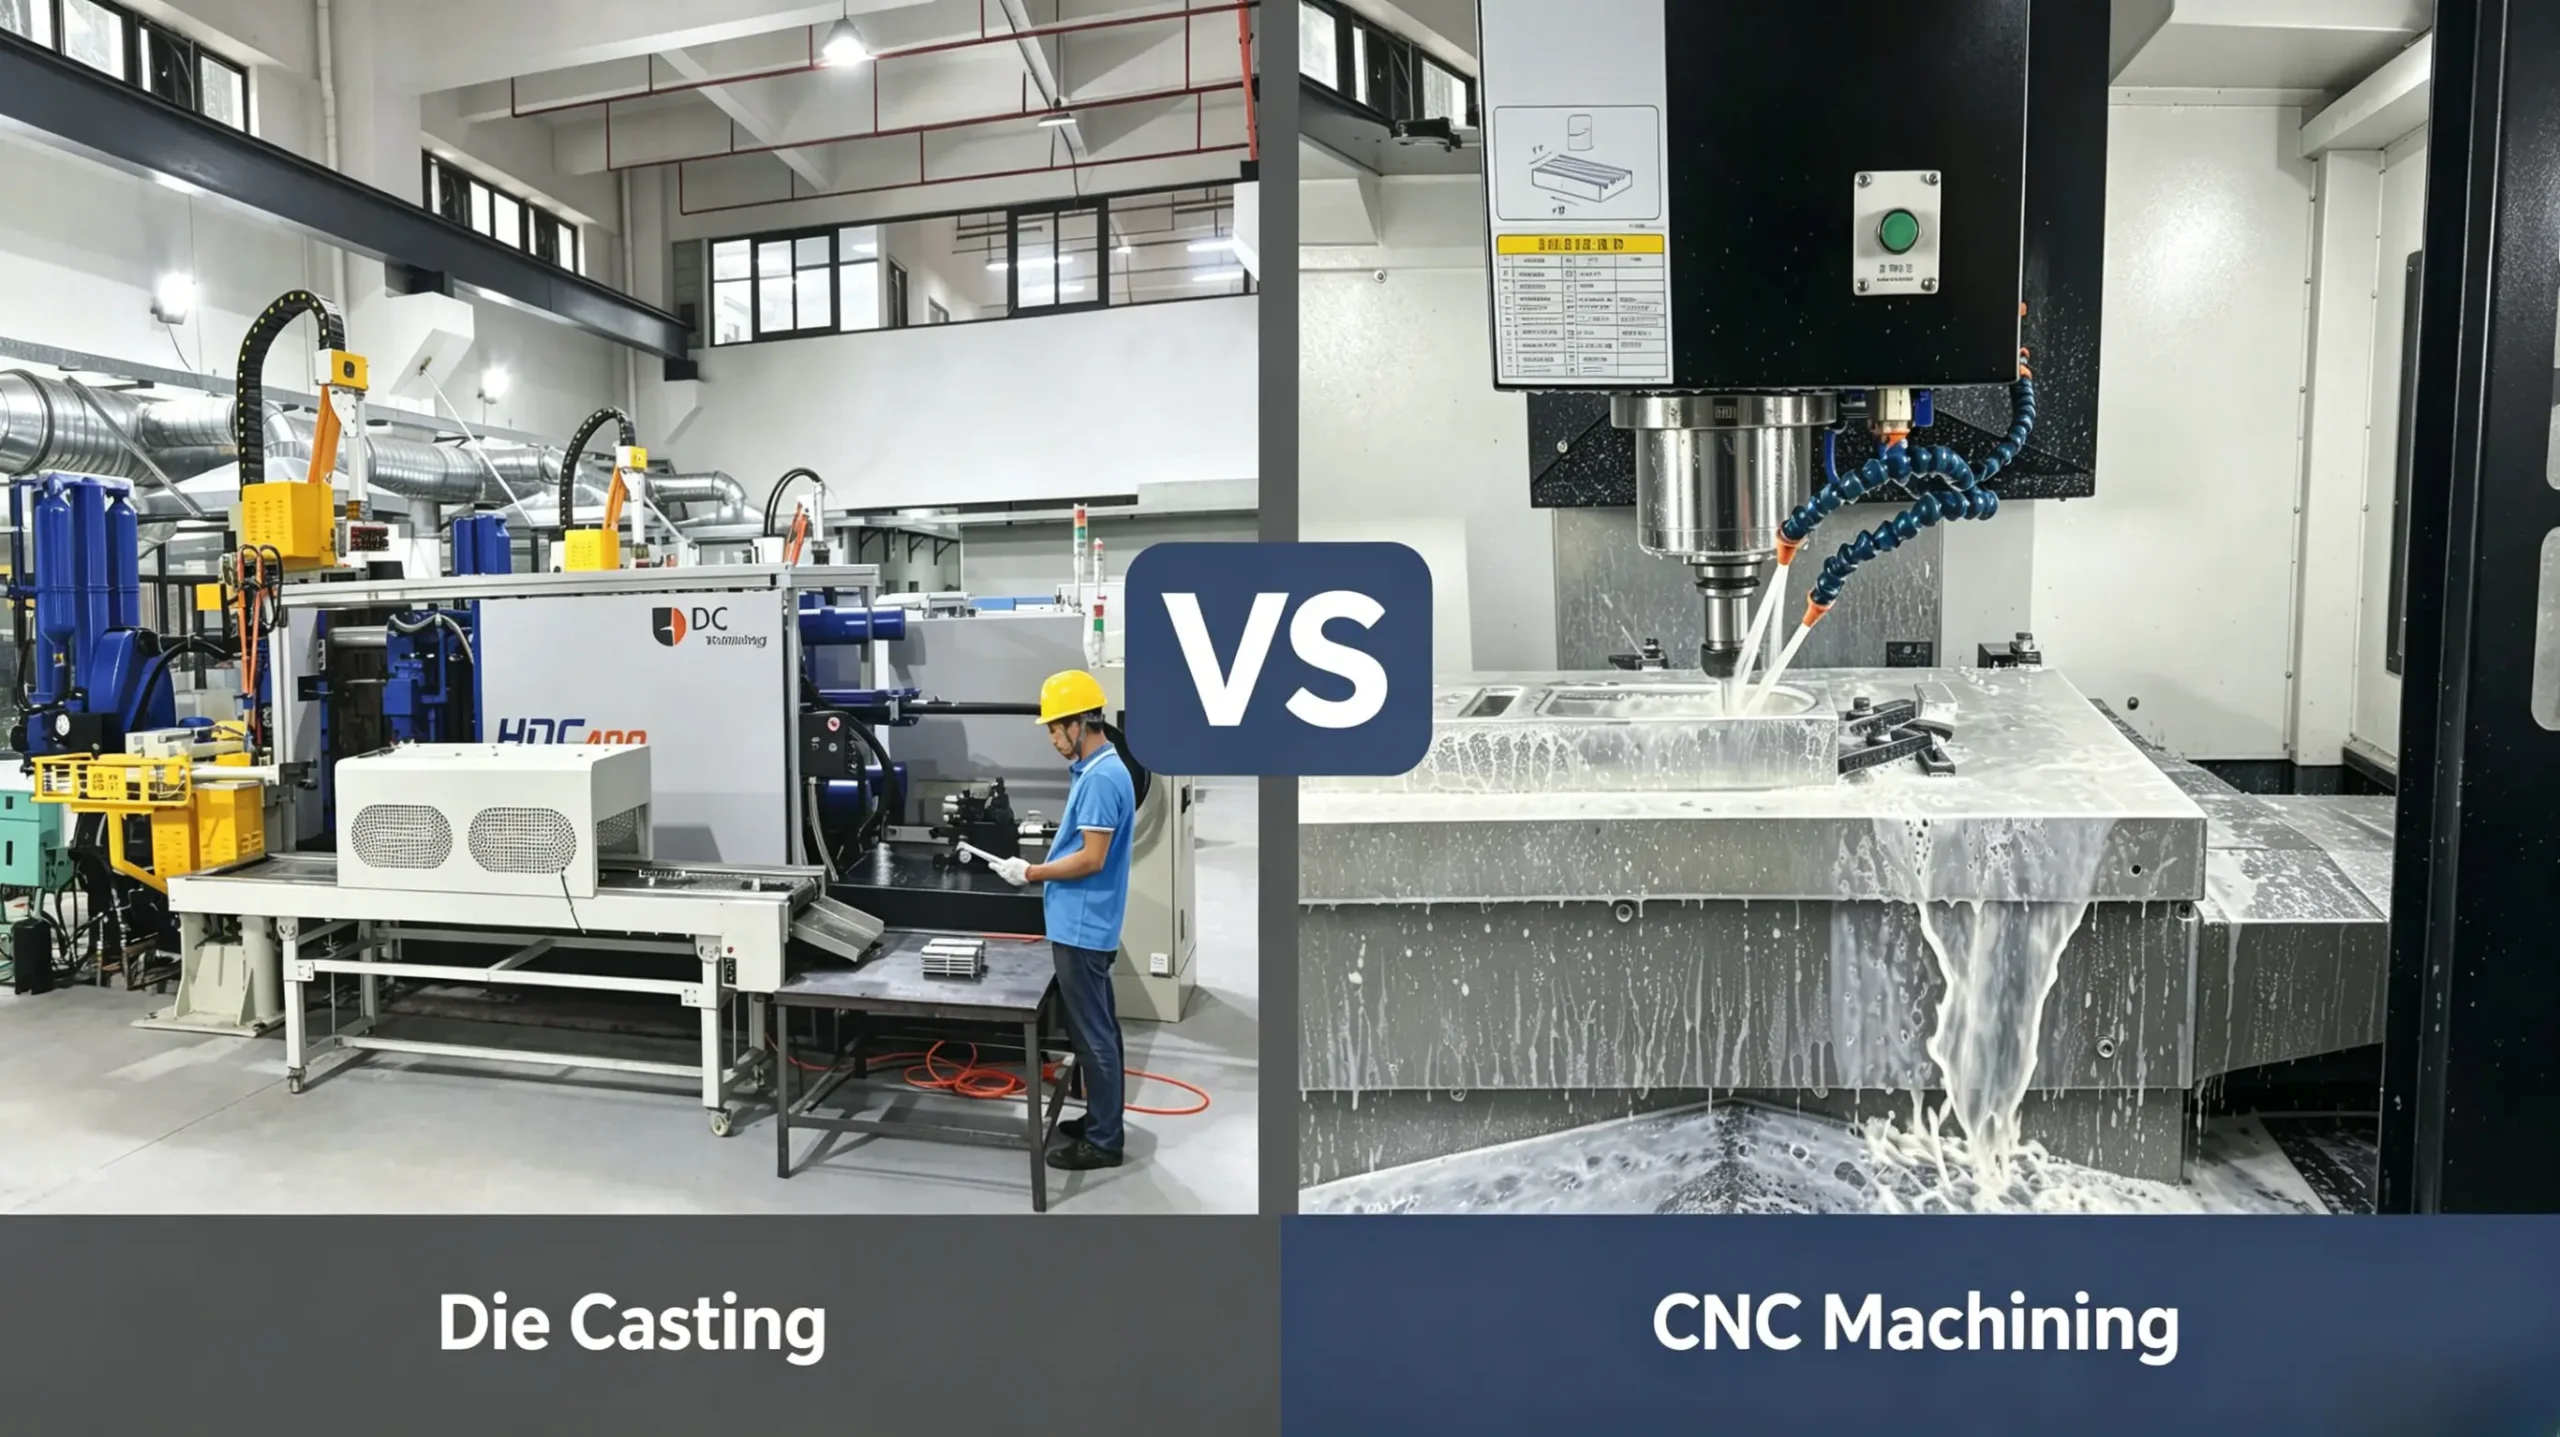
Unlike 3D printing, which is mainly used for visual or concept models, CNC prototyping uses materials and processes similar to those used in production. This allows prototypes to closely match final parts in strength, accuracy, and real-world performance, enabling engineers to validate manufacturability early and helping procurement teams assess cost, lead time, and production feasibility with confidence.
The CNC Prototyping Process: A Step-by-Step Breakdown
Custom CNC Prototyping Parts turns your digital designs into precise, functional parts. From initial CAD modeling to final quality checks, every step is carefully controlled to ensure accuracy, repeatability, and reliability. Below is a detailed look at the process.
Step 1: Design Submission & DFM Analysis
The process kicks off with the client submitting complete design files, which typically include 2D technical drawings (PDF/DWG), 3D models (STEP/IGS/X_T), and detailed specifications: required material, tolerance standards, surface finish requirements, quantity, and any industry-specific compliance (such as RoHS, ISO, or medical/food-grade standards).
Our engineering team then conducts a thorough Design for Manufacturability (DFM) Analysis, the most vital pre-production step to avoid costly reworks and delays. We evaluate every detail: checking for unprocessable sharp corners, thin walls, deep holes, or overly tight tolerances that exceed CNC machining capabilities; verifying material compatibility with the design structure; and confirming feasibility for secondary post-processing. We share a detailed DFM report with the client, proposing optimizations if needed, and finalize the design before moving forward.
Step 2: Quotation, Approval & Order Confirmation
Based on the finalized design, material selection, machining complexity, labor hours, post-processing, and delivery timeline, we provide a transparent, itemized quotation. The quotation breaks down all costs to eliminate hidden fees, ensuring full clarity for the client.
Once the client approves the quotation, we sign a formal production agreement, confirm the delivery schedule, and collect the agreed advance payment. At this stage, all design files, technical requirements, and delivery terms are locked in to avoid mid-production changes.
Step 3: Programming & Process Planning
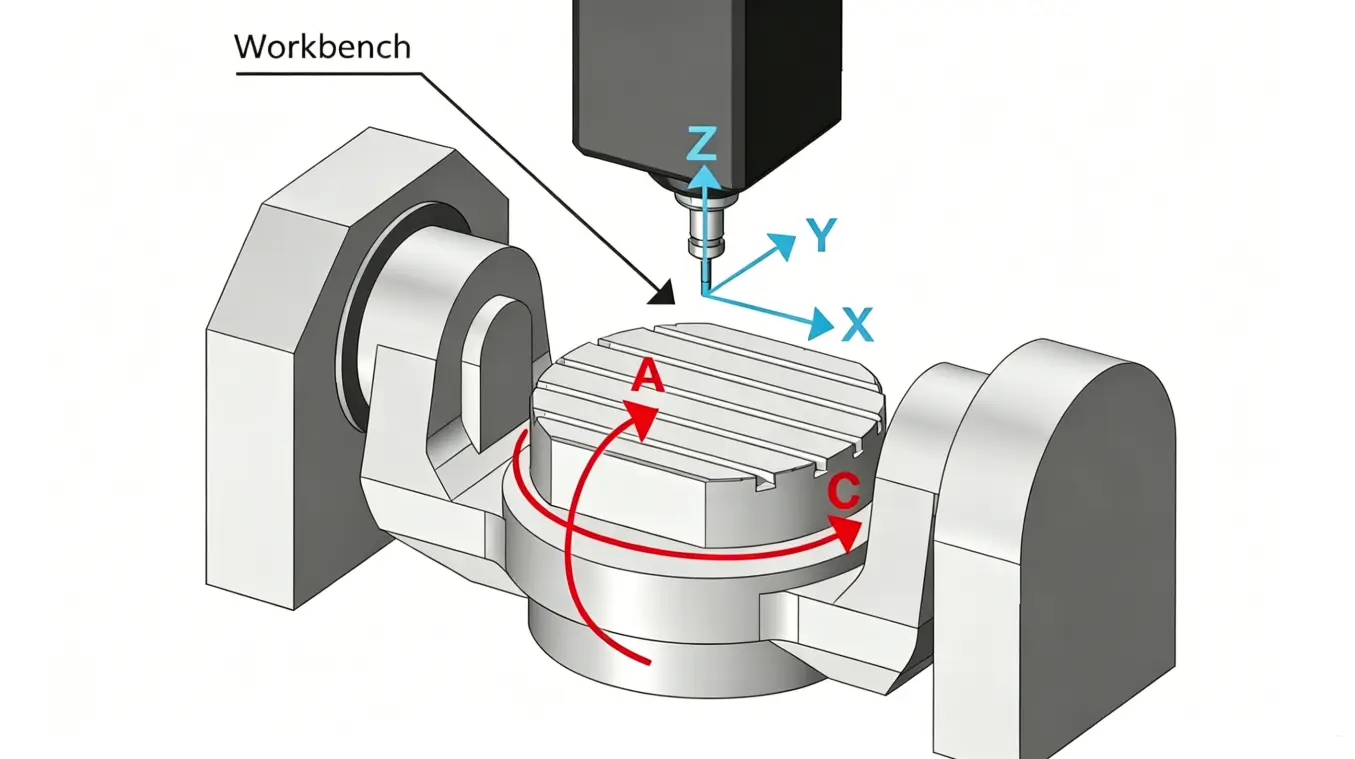
Our CNC programmers take over the approved 3D model and use professional software (UG, Mastercam, PowerMill) to generate precise machining programs (G-code). This step involves mapping out the full machining route: selecting the right CNC machine (3-axis, 4-axis, 5-axis, or turn-mill complex machine) based on part complexity, designing custom fixtures for stable clamping, and setting tool paths for roughing, semi-finishing, and finishing.
Process planning also includes defining cutting parameters, tool selection, and coordinate positioning to ensure minimal tool wear, consistent dimensional accuracy, and smooth surface finishes—laying the groundwork for error-free production.
Step 4: Material Preparation & IQC Inspection
We source high-quality raw materials (aluminum, stainless steel, carbon steel, brass, titanium, engineering plastics) from certified suppliers, matching exactly the material specified by the client. All incoming materials undergo strict Incoming Quality Control (IQC): we perform spectral analysis to verify material grade, check for surface defects, and confirm dimensional consistency of raw blanks.
Qualified materials are then cut to standard blank sizes using a sawing machine, removing excess material and preparing for CNC machining. Non-conforming materials are rejected immediately to ensure the prototype starts with quality raw stock.
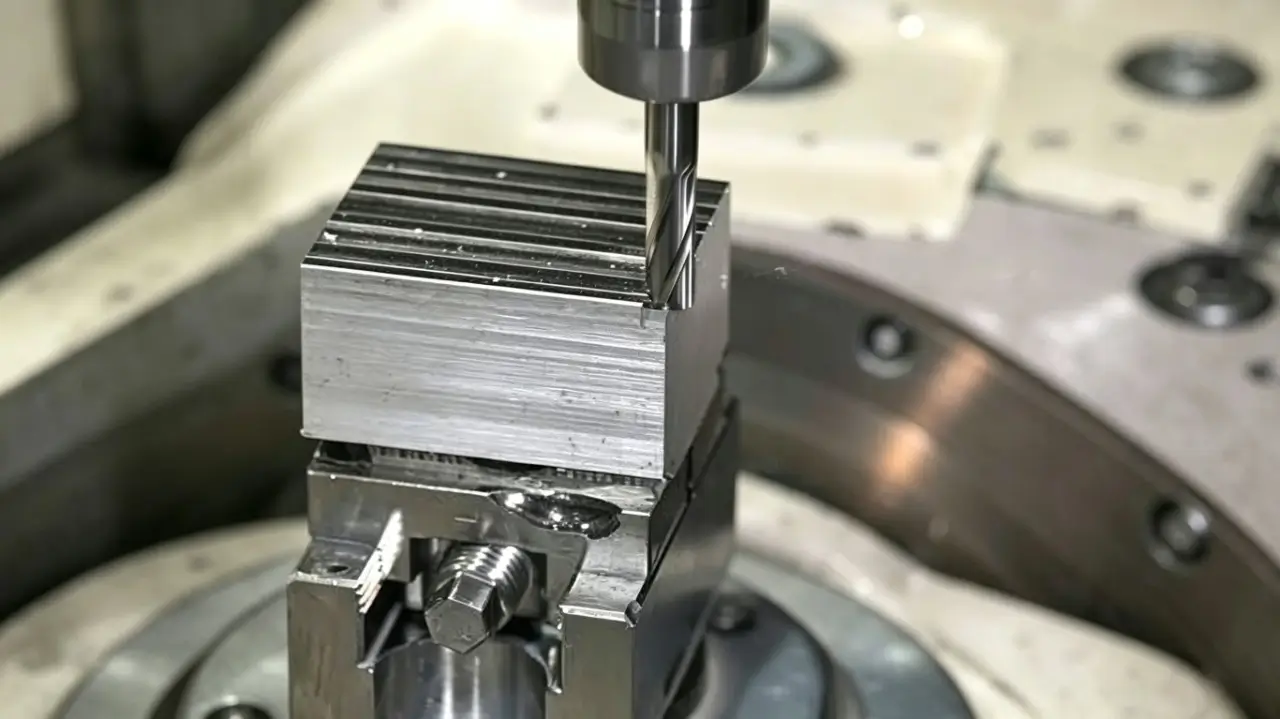
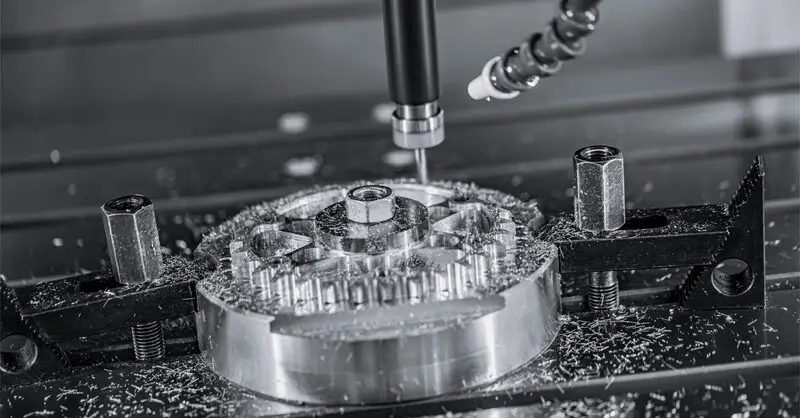
Step 5: CNC Machining (Roughing & Finishing)
Skilled CNC operators mount the blank onto the machine, install fixtures and cutting tools, calibrate the machine coordinate system, and load the pre-written G-code. Machining follows a three-stage process for optimal results:
1.Roughing: Quickly removes large excess material to form the basic shape of the part, maximizing efficiency.
2.Semi-Finishing: Leaves a small, uniform allowance for finishing, correcting minor deformations from roughing.
3.Finishing: Achieves the exact dimensional tolerance, specified surface roughness, and detailed features (drilling, tapping, chamfering, countersinking) as per the design.
Step 6: Deburring & Preliminary Cleaning
After machining, parts are unloaded from the machine and undergo manual or mechanical deburring to remove sharp edges, burrs, and cutting residues—this prevents injury during later inspection and handling, and improves overall part aesthetics.Parts are then cleaned with industrial cleaning agents or ultrasonic cleaning to remove cutting oil, metal shavings, and impurities, preparing them for post-processing or initial quality inspection.
Step 7: Secondary Post-Processing (Customizable)
Most CNC prototypes require secondary post-processing to enhance performance, corrosion resistance, or appearance. We offer a full range of standard post-processing options based on client needs:
1. Surface Treatments: Sandblasting, polishing, brush finishing, anodizing (for aluminum), passivation (for stainless steel), black oxide (for carbon steel), plating, powder coating
2.Heat Treatment: Quenching, tempering, annealing to improve hardness, toughness, and wear resistance
3.Precision Finishing: Grinding, honing for ultra-tight tolerances and mirror-like surfaces
Step 8: Full Quality Inspection (FQC)
Quality control is non-negotiable in CNC prototyping. Our QC team conducts a full inspection using precision measuring tools, including calipers, micrometers, plug gauges, height gauges, profile projectors, and Coordinate Measuring Machines (CMM) for high-precision parts.
We verify all critical dimensions, tolerances, surface finish, material properties, and appearance, checking for scratches, deformations, or color inconsistencies. A detailed inspection report is compiled for each batch, and only 100% qualified parts move to the next stage—defective parts are isolated and reworked or scrapped per quality protocols.
Step 9: Final Cleaning, Rust Prevention & Packaging
Qualified parts receive a final ultrasonic cleaning and air drying to remove any post-processing residues. For metal parts, we apply anti-rust oil or wrap with anti-rust paper to prevent corrosion during storage and shipping.
Parts are carefully packaged with pearl cotton, foam liners, or separate compartment boxes to avoid collision, scratches, or deformation during transit. Each package is labeled clearly with part number, batch number, quantity, and client information for easy identification.
Step 10: Delivery & After-Sales Support
The final step is secure and timely delivery: we arrange logistics per the client’s requirements (express shipping, air freight, sea freight for bulk orders) and provide a tracking number for real-time shipment monitoring. For international orders, we prepare all necessary customs documentation to ensure smooth clearance.
After delivery, our team remains available for after-sales support: addressing client feedback, answering technical questions, and resolving any post-delivery issues promptly. This closed-loop process ensures full client satisfaction and long-term partnership.
Surface Finishes: Enhancing Functionality and Aesthetics
Surface finishes applied during CNC prototyping help improve corrosion resistance, surface texture and prototype durability. Proper finishing also enhances appearance evaluation and allows prototypes to better represent final production parts during engineering testing and product validation.
Anodizing
Mostly applied to aluminum CNC prototypes, anodizing forms a hard, protective oxide layer on the metal surface. It greatly improves corrosion resistance and abrasion resistance, while supporting customized color options such as black, silver, blue and red. It is widely used for electronic enclosures, automotive parts and consumer product prototypes that need both protection and decorative effect.
Plating
Metal plating including nickel plating, chrome plating and zinc plating is a common surface finish for steel and alloy CNC parts. It adds an extra protective outer layer, increases surface hardness, improves electrical conductivity, and prevents oxidation. Perfect for mechanical connectors, precision gears, hardware components and medical prototype parts with high durability demands.
Bead Blasting
Bead blasting uses fine glass beads to blast the part surface, removing tool marks, cutting lines and sharp burrs. It creates an even, smooth matte finish with uniform texture. This treatment is ideal for cosmetic CNC prototypes and serves as a perfect base preparation before painting or further coating.
Polishing
Polishing removes tiny surface imperfections, machining traces and flaws to create a sleek, mirror-like smooth surface. It reduces surface friction for moving mechanical parts and delivers a high-end visual effect for display and aesthetic prototypes. It is commonly used for stainless steel, aluminum and high-precision decorative CNC components.
Three Core Advantages of CNC Prototyping
CNC prototyping enables fast product validation with production-grade metals, high dimensional accuracy and reliable functional testing. It helps engineering teams evaluate part performance, optimize designs and reduce development risks before moving into full-scale manufacturing.
Real Material Performance Validation
CNC prototypes are machined from the same metal materials used in final production, including aluminum, stainless steel, brass, copper and titanium. This allows engineers to accurately evaluate mechanical strength, heat resistance, structural stability and overall part performance under real application conditions. Early material verification helps reduce redesign risks and improves product development efficiency.
High Precision and Surface Consistency
CNC machining delivers tight tolerances, stable dimensional accuracy and excellent surface quality for complex metal prototype parts. Consistent machining precision is essential for assembly verification, functional evaluation and appearance testing, helping prototypes closely match final production expectations.
Functional Testing and Assembly Verification
Unlike display-only prototype methods, CNC prototypes can be directly used for assembly checks, structural testing and functional validation. Engineering teams can quickly identify fitment issues, structural weaknesses and design problems before production, accelerating product optimization and shortening development cycles.
ZH Precision CNC Prototype Lead Time
ZH Precision provides fast and flexible CNC prototyping services for metal parts, supporting rapid product validation and engineering development. Lead times vary based on part complexity, machining requirements and surface finishing processes, helping customers accelerate prototype testing and shorten development cycles.
| Part Complexity | Standard Machining | With Standard Surface Finish | With Complex Surface Finish |
| Simple Parts | 3–4 Days | 4–6 Days | 6–8 Days |
| Medium Complexity Parts | 4–7 Days | 3–5 Days | 10–14 Days |
| Complex Precision Parts | 7–10 Days | 7–10 Days | 15–20 Days |
Notes:Lead times reflect typical CNC prototyping workflows and may vary depending on part size, material, tolerances, and specific surface treatment requirements.
Practical Tips for Buyers and Engineers in CNC Prototyping
CNC prototyping success depends not only on design accuracy but also on clear communication and proper preparation between buyers and manufacturers. The following practical tips help improve manufacturability, reduce errors, and accelerate development cycles.
Provide Complete Manufacturing Files
Submit a fully detailed 3D CAD model together with clearly annotated 2D engineering drawings. Complete data helps engineers accurately understand design intent, reduce interpretation errors, and improve prototyping efficiency.
Define Critical Dimensions Clearly
- Class A (Critical): Key dimensions that directly affect function and assembly, requiring tight tolerance control
- Class B (Important): Functional dimensions with moderate tolerance flexibility
- Class C (Reference): Non-critical reference dimensions
This classification helps manufacturers prioritize machining and inspection efforts based on functional importance.
Communicate Application Requirements Clearly
Clearly describe the prototype’s intended use, testing conditions, and any special performance requirements. Accurate communication reduces ambiguity and ensures the prototype meets functional expectations from the start.
Utilize Supplier Engineering Expertise
Experienced CNC prototyping suppliers can provide valuable DFM feedback, including material selection, machining strategy, and process optimization. Early collaboration helps improve manufacturability, reduce costs, and accelerate iteration cycles.
Conclusion
CNC prototyping provides a reliable process for turning designs into functional, high-precision parts. From CAD modeling and material selection to CNC machining, post-processing, and inspection, each step ensures accuracy, efficiency, and manufacturability. With proper planning and workflow optimization, engineers and procurement teams can validate designs and move smoothly toward production.
By working directly with the manufacturing facility, customers can avoid extra cost layers from intermediary platforms. ZH Precision’s factory-direct CNC prototyping and machining services ensure consistent pricing from prototype to production, supporting better cost control and long-term sourcing decisions.
FAQ
A:We recommend providing a 3D CAD model (STEP, IGES, or X_T format) along with 2D engineering drawings. Clear annotations for critical dimensions, tolerances, and surface requirements help ensure accurate manufacturing and faster quotation.
A:Yes. Expedited CNC prototyping services are available for urgent projects. Delivery time depends on part complexity, material availability, and machining requirements. Early engineering confirmation helps prioritize production and shorten lead time.
A: CNC prototype pricing is higher because setup costs, programming, machining time, and engineering validation are not shared across multiple units. Unlike mass production, these fixed costs are applied to each single part.
A: ZH Precision is certified to ISO 9001:2015 and IATF 16949:2016, ensuring standardized quality management and stable CNC manufacturing processes.